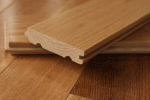
Fixing common marks and grooves in wood flooring is easier than you think
The strength and durability of solid wood is one of the reasons that it remains so popular, with anyone spending their money on it safe in the knowledge that they’re making a seriously long-term investment. However, whilst the wood itself will last for years, that (unfortunately) doesn’t mean it’ll remain completely mark-free, especially if you’ve got a young family running around causing chaos! That’s why we’ve put together this list of the best ways to remove the imperfections in your timber.
Common Problems
An irritatingly common mark is the one caused by someone leaving a hot mug on the wood without a coaster (despite how many times you’ve told them not to!). The ugly white circle that remains after the drink has been whipped away can be removed with a few different methods, so try each one out and see which works best on yours. A small mix of baking soda and 1 teaspoon of water is popular (don’t use too much water, though!), as is the use of petroleum jelly. Car wax can get the job done, as can a mix of salt and water (again, not too much water). The other main technique used is to gently rub some non-gel toothpaste onto the mark.
Minor Marks
On some occasions you may find that your timber suffers from scratches that don’t need the full wood filler treatment, but are still visible. If this is the case with your wood, then there are a variety of different home remedies that will reduce their visual effect. Though you should use a cotton bud to apply them (due to the need to avoid staining the wood) the following materials have all been noted as scratch fillers: a paste comprising of water and instant coffee, iodine, material from a matching colour crayon, glue, walnut meat (yes, really!) and of course, quality furniture wax. Remember to give things a good polish if you take the coffee approach, to keep the smell from lingering!
Deeper Dents
Over a long enough period of time, most solid wood will obtain the odd deeper groove in addition to the minor but unsightly scratches. The best way to deal with the more substantial chips and scratches is to use simple, standard wood filler. This can usually be obtained in the same shade as your timber, which means that once it’s been applied it will be barely noticeable. First, you need to gently sand down the chipped area to ensure that any splinters from the groove have been removed. Then add the filler to the damaged area, slightly raised above the line of the wood – this is due to the fact that the filler will shrink slightly as it dries. Once this occurs, carry out a final sanding to level the area off.
Dried Glue
The final problem that can occur is actually dried glue being left over from the installation of the wood – hey, it happens! Fortunately, there is a simple way to combat this. All you need to do is take a conventional paint scraper or chisel and simply slide it along the surface, flicking away the excess glue if you do. Sandpaper is also a popular way to remove it, and probably the more sensible choice if you don’t trust yourself with expensive timber and a sharp implement!
Sean Evans worked as a floor installer for over 10 years before turning his hand to a customer sales role with his local wooden flooring supplier. He regularly helps homeowners who have accidentally damaged their new products!

